SQL, or Structured Query Language, is a specialized language used to manage and manipulate relational databases on various operating systems.
To execute SQL queries, you typically interact with a database management system (DBMS). If you're looking for a quick start, you can use our free online SQL editor that allows you to run SQL commands directly in your browser without any setup.
For those who prefer to set up SQL on their local machine, this guide will walk you through the installation process for popular database system MySQL on Windows, macOS, and Linux (Ubuntu).
Install MySQL on Windows
To install MySQL on Windows, follow the steps below:
- Download MySQL Installer
- Run the MySQL Installer
- Choose Setup Type
- Select and Install Required Products
- Configure MySQL Server
Here's a detailed explanation of each of the steps.
Step 1: Download MySQL Installer
Go to the MySQL Downloads page and download the MySQL Installer for Windows.
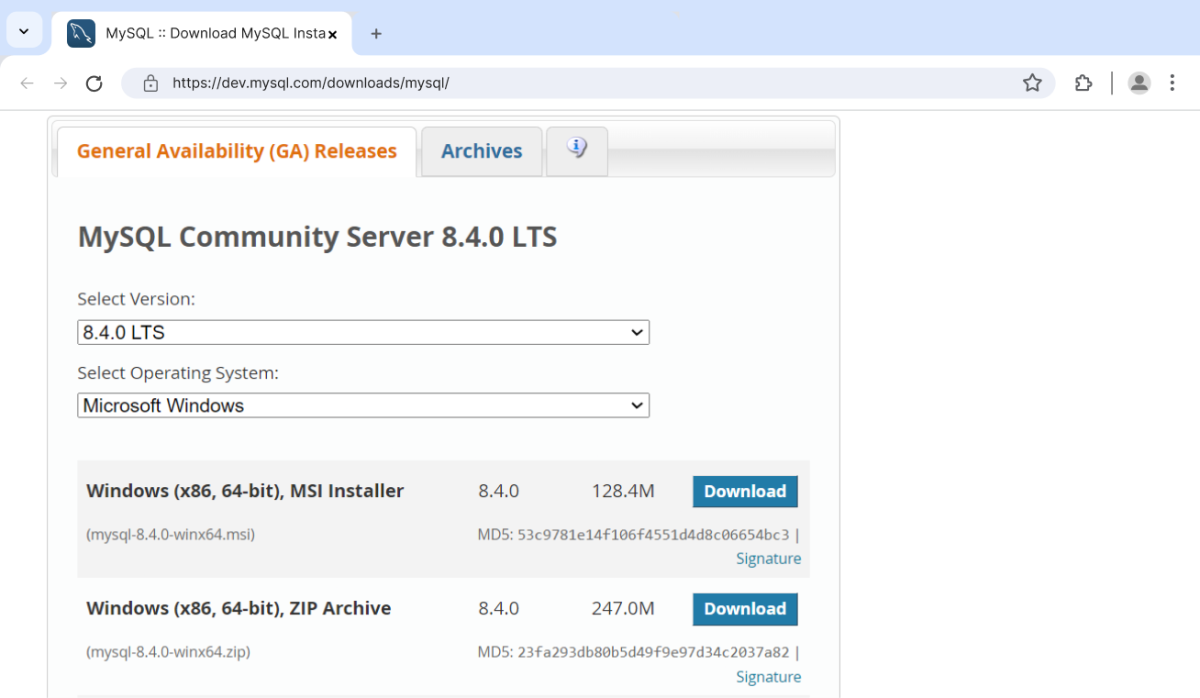
Note: It is recommended to install the community version not the web installer (i.e. install the second one).
Step 2: Run the MySQL Installer
Once the download is complete, go to your downloads folder and run the installer. You will be prompted to allow the installer to make changes to your device.
Simply click Yes and proceed.
Step 3: Choose Setup Type
The installer will prompt you to several setup types as shown below.
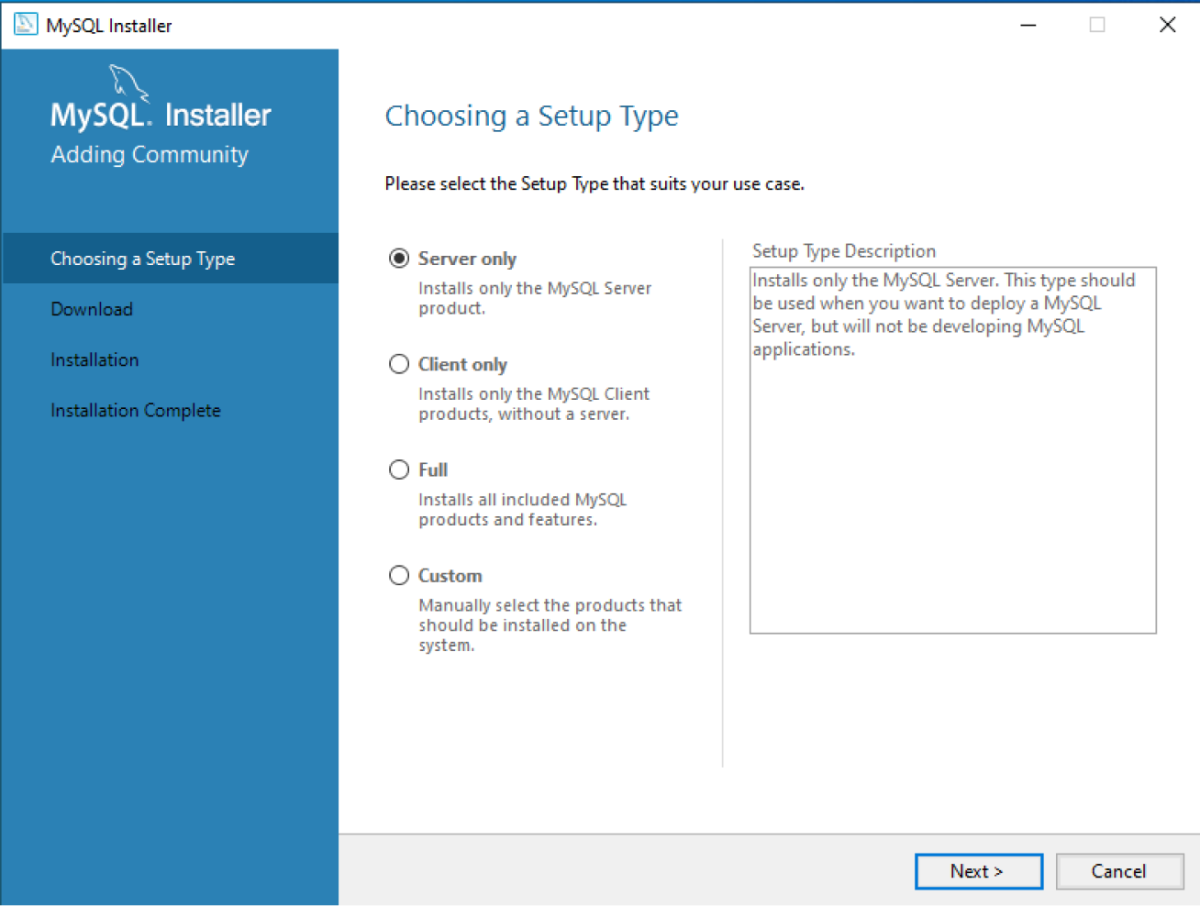
You can select the custom type here to select the products that should be installed on the system and click on Next to continue.
Step 4: Select and Install Required Products
From the list of available products, select MySQL Server and MySQL Workbench.
Once you have made your selections, click on the green arrow associated with each product. This moves your selected products into the queue for installation.
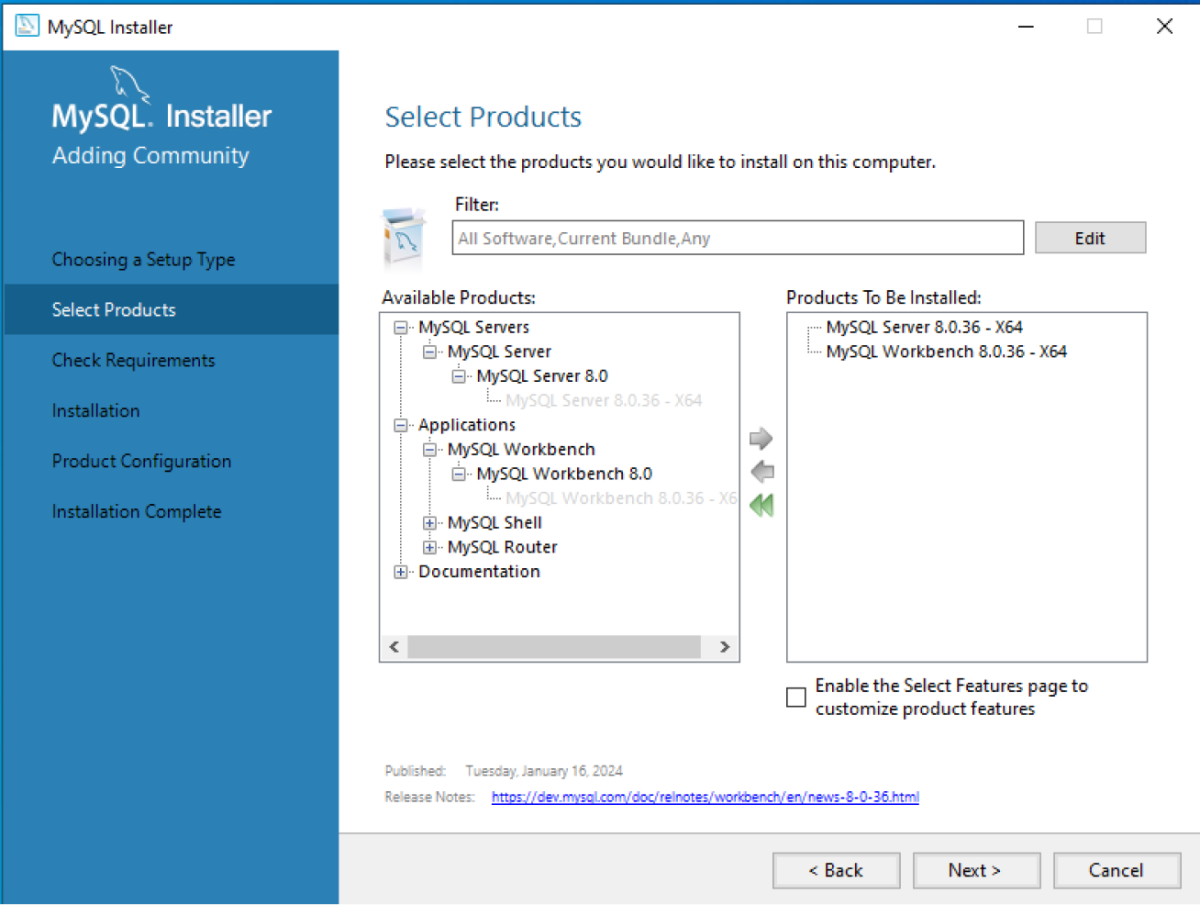
Click on Next to continue.
To begin the installation process, simply click on the Execute button and keep on clicking Next to continue the process.
Step 5: MySQL Server Configuration
Now, you will be prompted to set network options, where the default settings are recommended. You will also have to create a strong password for the root account.
Once you have configured the server options, click Next to apply the configuration.
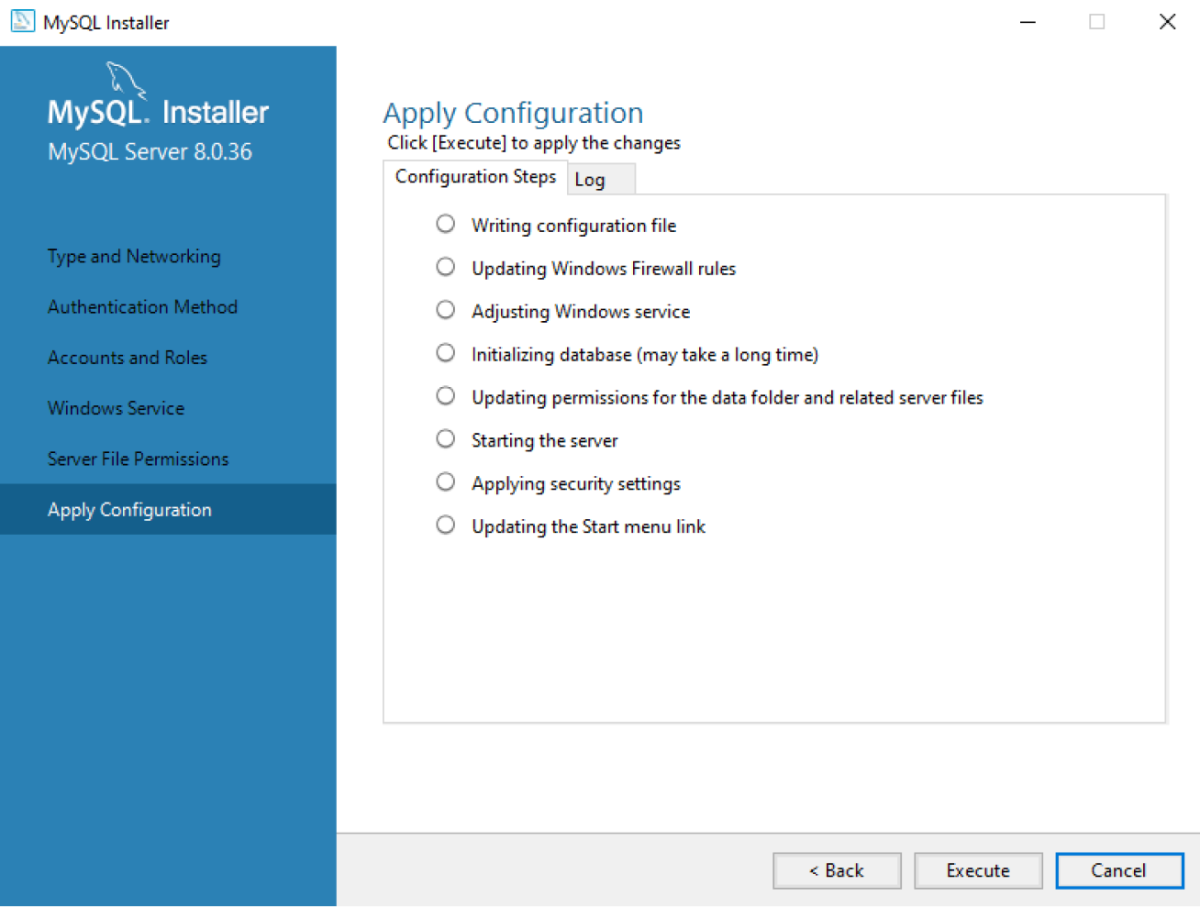
You will apply the changes by progressing through the prompts and conclude the server setup by clicking Finish.
Now, you are all set to run your SQL query.
Install MySQL on macOS
To install MySQL on macOS, follow the steps below:
- Download MySQL Installer
- Run the Installer
- Configure MySQL Server
- Install MySQL Workbench (optional)
- Verify your Installation
Here's a detailed explanation of each of the steps.
Step 1: Download MySQL Installer
Go to the MySQL Downloads page and download the MySQL Community Server for macOS.
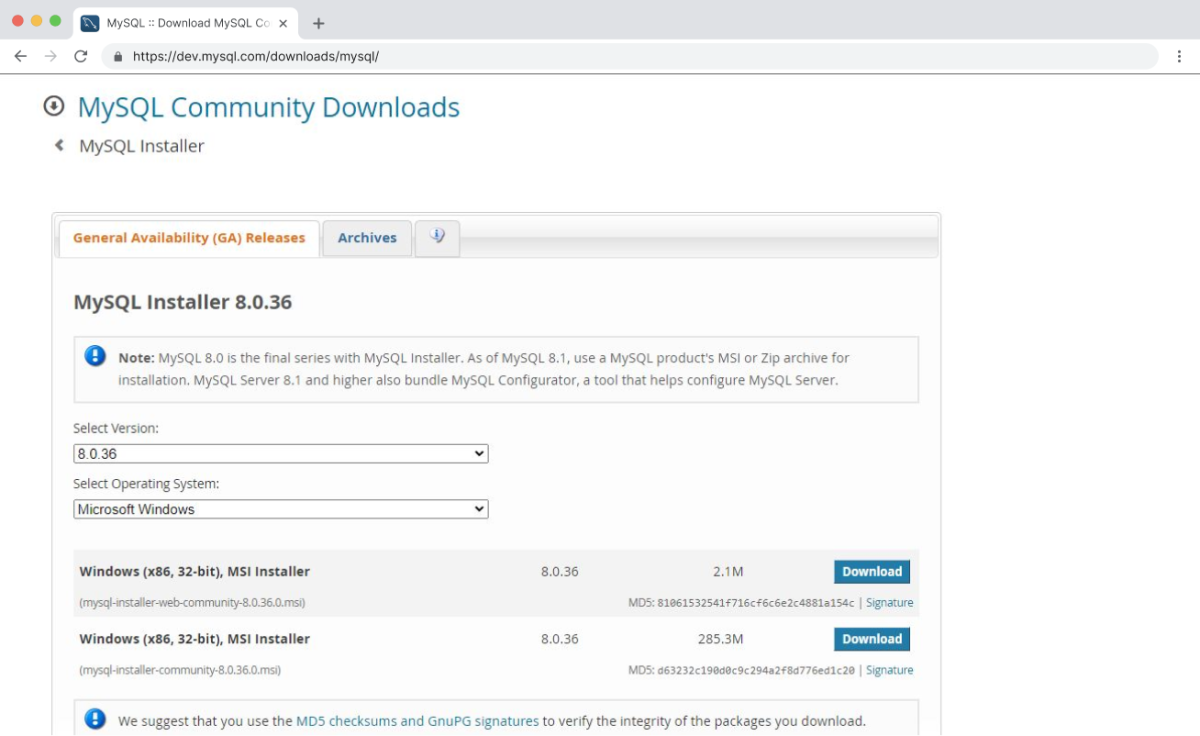
Step 2: Run the Installer
Once the download is complete, open the downloaded DMG file and follow the installer prompts. You will be prompted to allow the installer to make changes to your device.
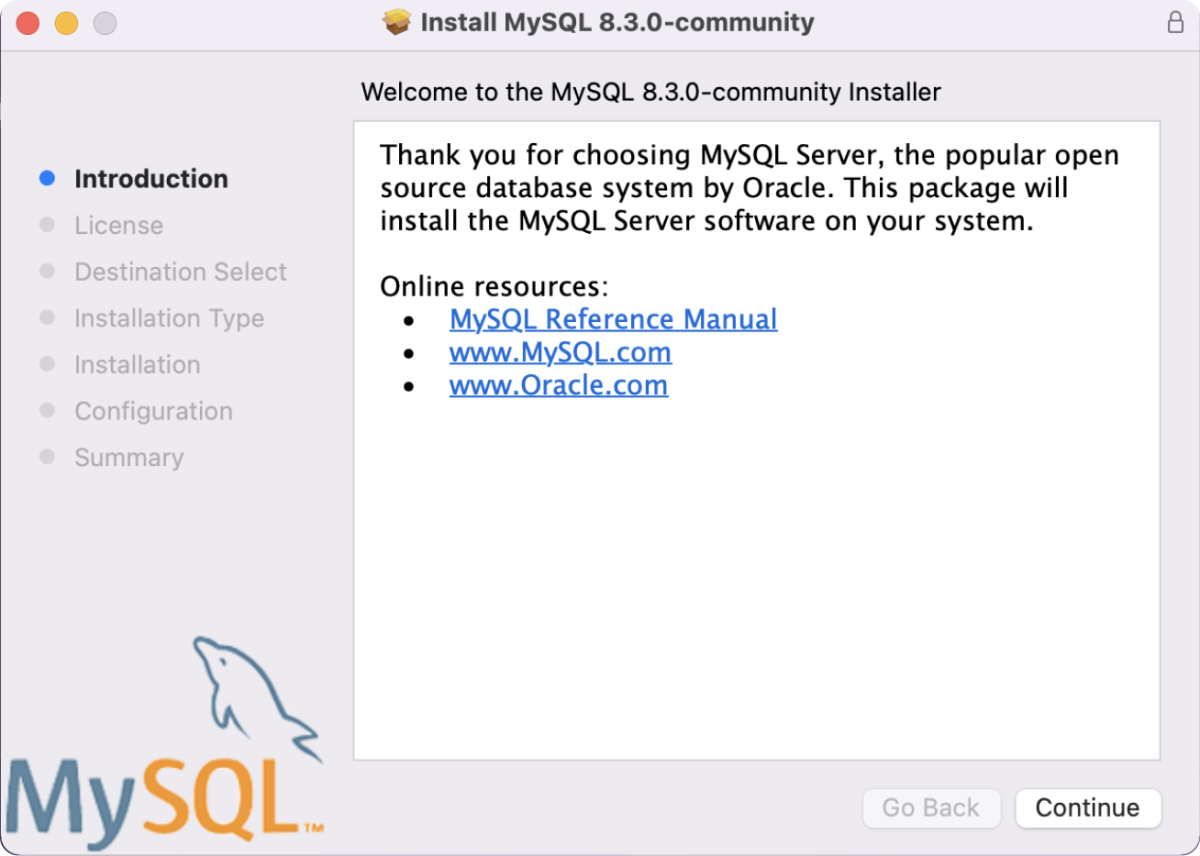
Simply click Continue and proceed.
You will also need to agree to the software license agreement.
Step 3: Configure MySQL Server
At the end of the installation process, the installer will launch the configuration wizard. You will be prompted to set a strong root password.
You will need to select other configuration options such as starting MySQL at boot. The default settings are generally recommended for most users.
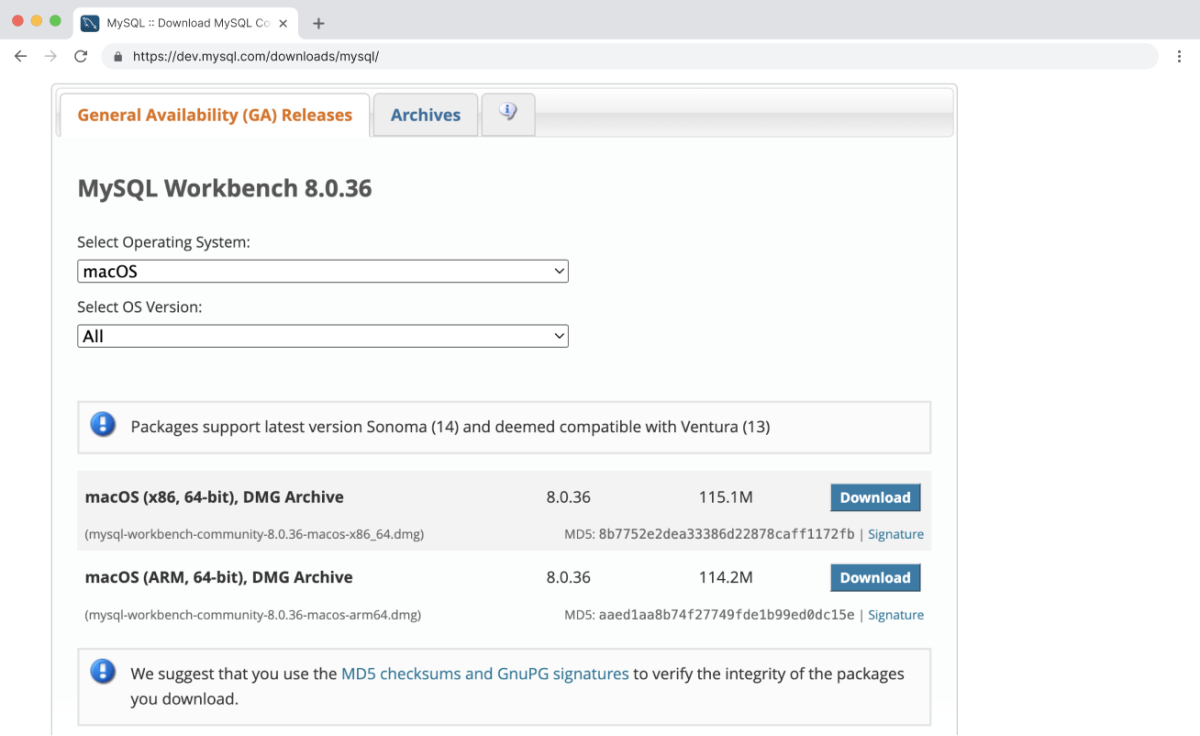
Step 4: Install MySQL Workbench
You can install MySQL Workbench from the MySQL Workbench download page.
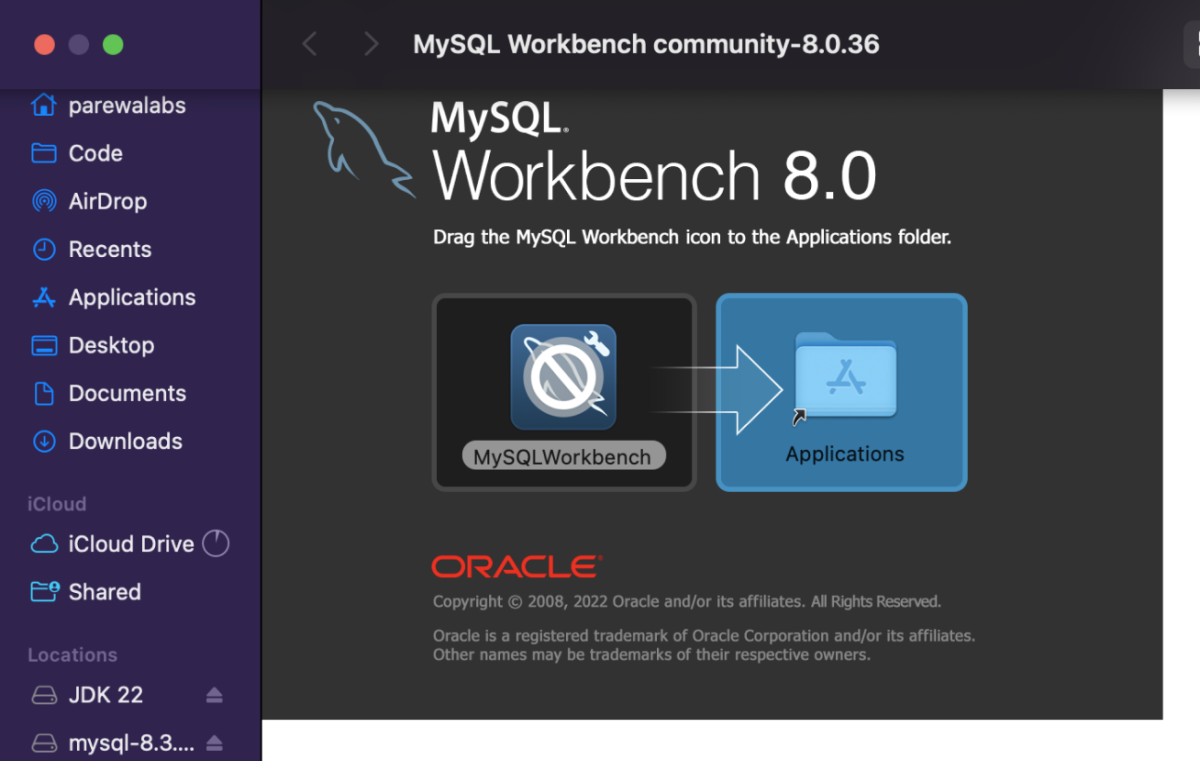
Open the installed file, and drag the MySQL Workbench to the Applications folder.
Step 5: Verify your Installation
Once the installation is complete, you can verify it by typing the following command in the Terminal.
mysql -u root -p
You will be prompted to enter the root password you set earlier. Once you enter your password, you will see the installed version of SQL on your device.
Now, you are all set to run your SQL query.
Install MySQL on Linux
Linux has various distributions, and the installation process differs slightly from each other. For now, we will focus on Ubuntu distribution.
To install MySQL on your Ubuntu system, follow the steps mentioned below:
- Update and Upgrade Ubuntu
- Install MySQL Workbench using Apt Repository
- Optional DEB Installation
- Launch MySQL Workbench
Here's a detailed explanation of each of the steps.
Step 1: Update and Upgrade Ubuntu
Before installing MySQL, you should ensure your Ubuntu system is up-to-date.
Open the Terminal and type
sudo apt update
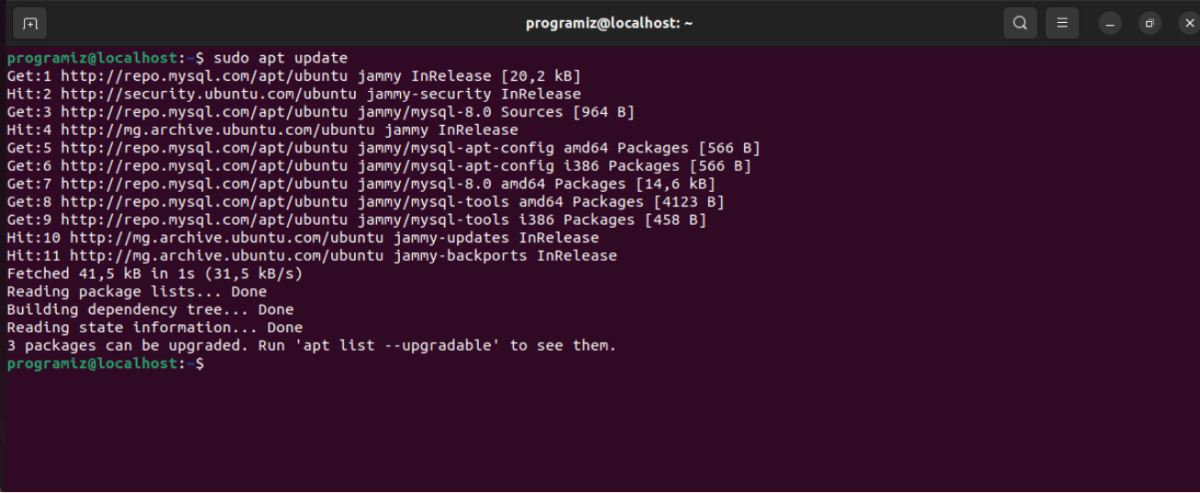
Now, upgrade your Ubuntu system using
sudo apt upgrade
Step 2: Install MySQL Workbench using Apt Repository
To install MySQL workbench directly using the apt repository, type the following command
sudo apt install mysql-workbench
Step 3: Optional DEB Installation
You can also install MySQL Workbench by using the DEB package. This process is completely optional.
Go to the official MySQL download page and click on the download button.
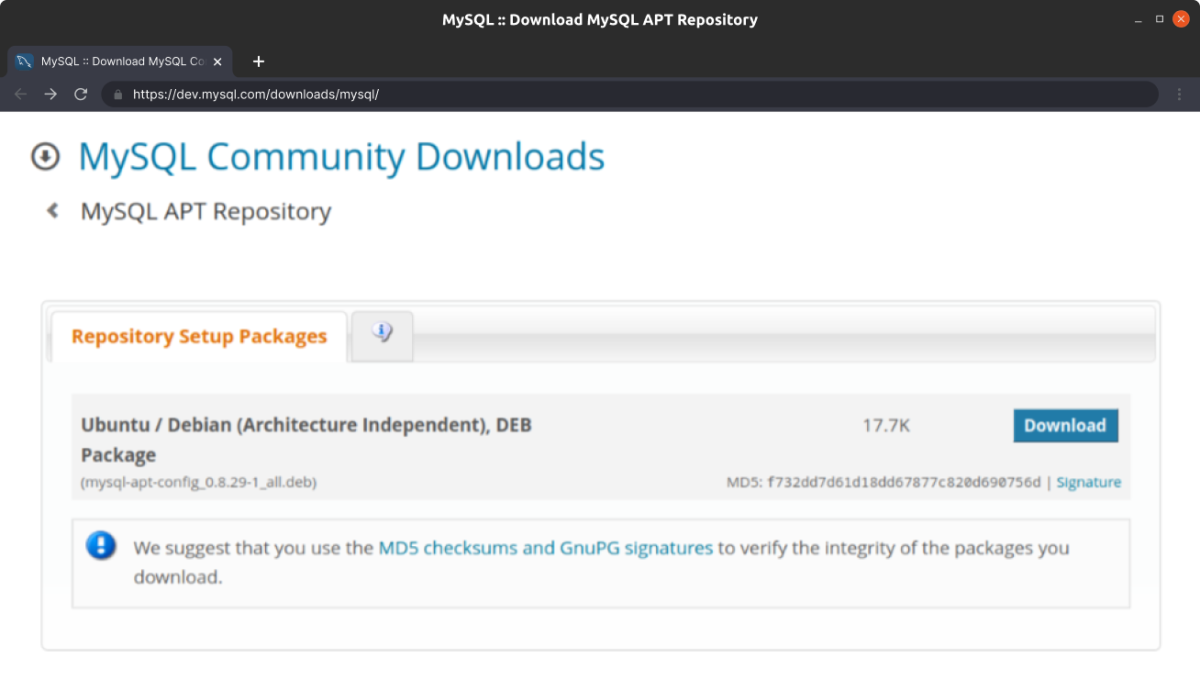
Before the download starts, MySQL suggests to login or sign up for an Oracle Web account. To skip signing in for a free account, click No thanks, just start my download.
Once the download is complete, navigate to the Downloads folder in the terminal and list the content of the directory.
cd Downloads
ls
You will see the official MySQL repository to the apt source list by running the command:
sudo apt install ./mysql-apt-config_0.8.29-1_all.deb
Note: The name of the deb file may differ if you downloaded a different version of mysql-apt-config.
Once the installation is complete, update the apt cache using
sudo apt update
Now, finally install MySQL Workbench by running
sudo apt install mysql-workbench-community
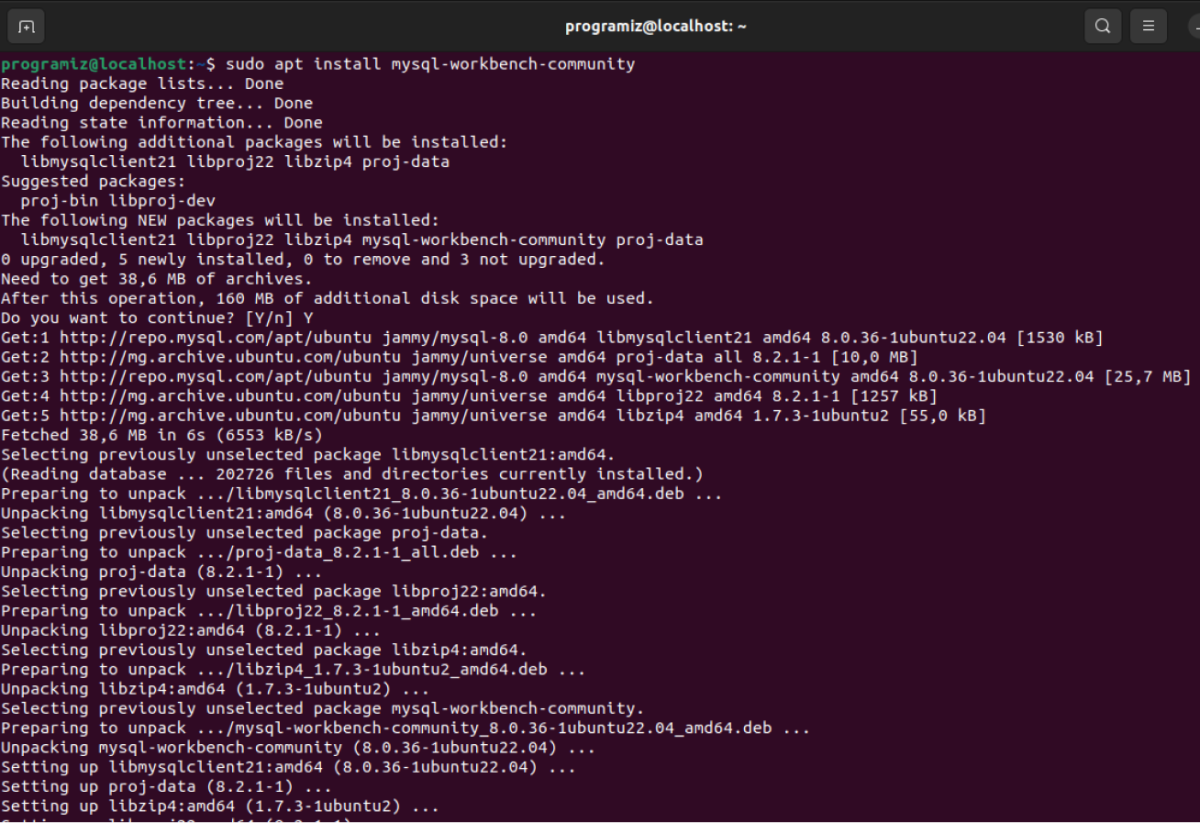
Press y when asked to confirm the installation and wait for the process to complete.
Step 4: Launch MySQL Workbench
Once you have installed the workbench, you can launch it using the following command.
mysql -workbench
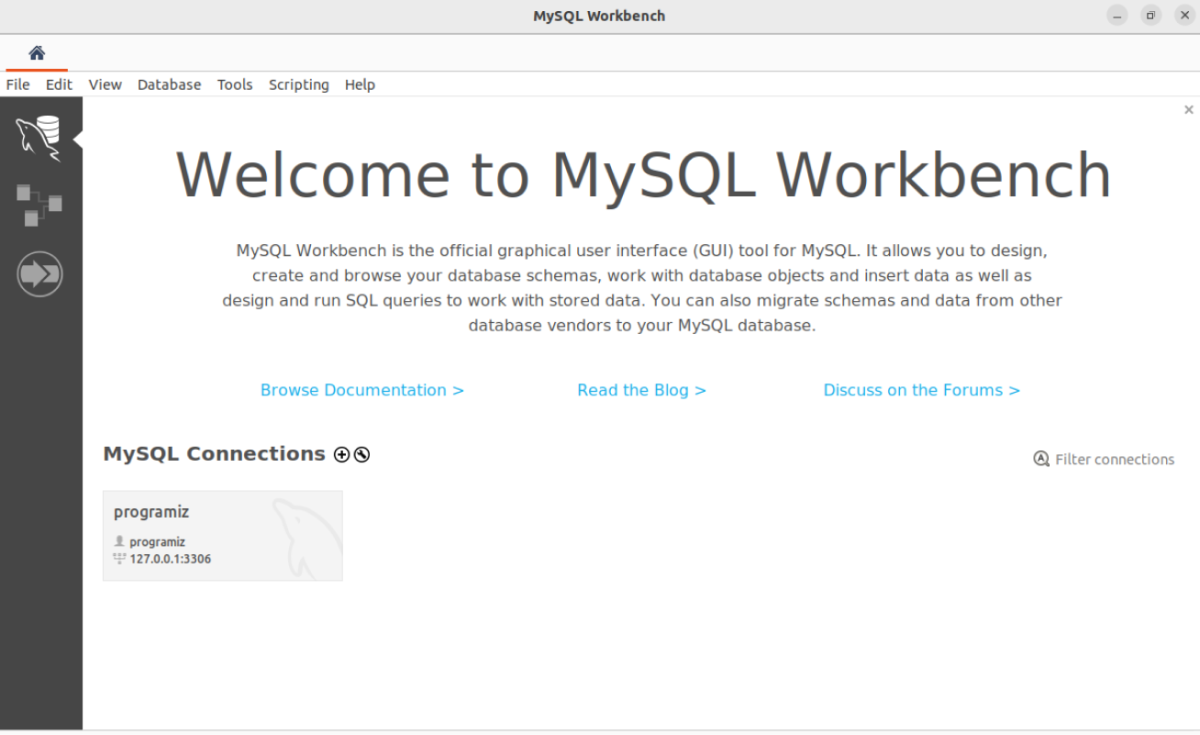
Run your First SQL Query
Open MySQL Workbench and click on Local Instance MySQL 80 on the left side of the screen to connect to your local MySQL server instance.
Then, login with the root password you set earlier.
Now, write the following query in the Workbench's editor.
CREATE DATABASE subjects;

CREATE TABLE subjects.Math (
student_marks INT,
student_name VARCHAR (255)
)
Then click on the execute button to run the query.
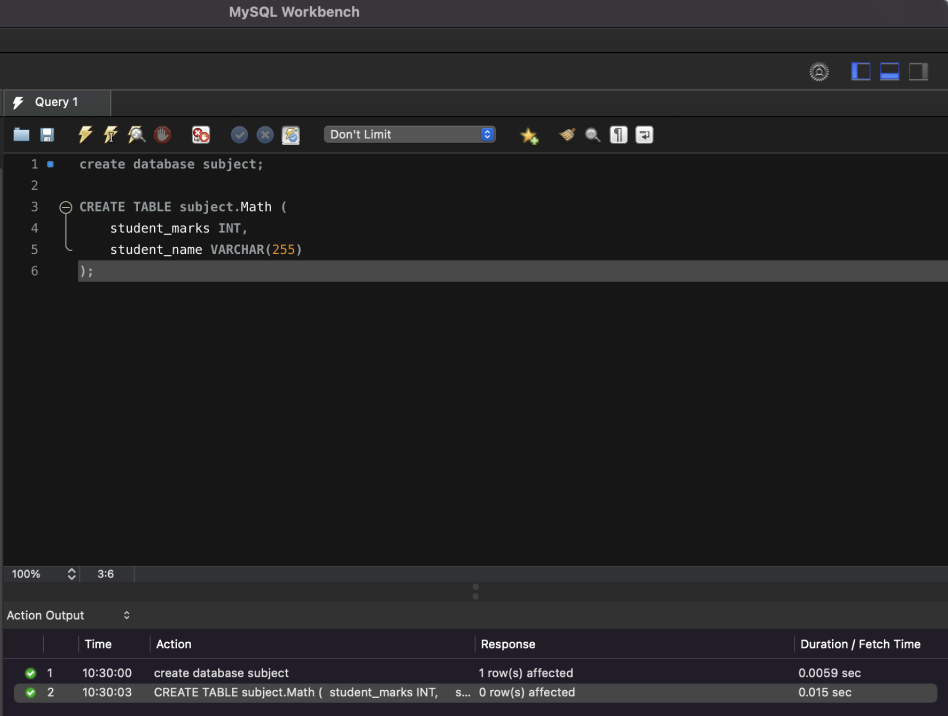
You should see the above output on terminal.
Now that you have set everything up to run SQL queries on your computer, you'll be learning the basics of SQL in the next tutorial.